Tips to Weeding Crafting Vinyl
share on social:
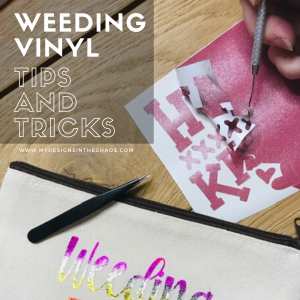
WEEDING VINYL: THE BEST TIPS AND TRICKS TO WASTE LESS AND MAKE THE PROCESS AS SMOOTH AND EFFECTIVE AS POSSIBLE
Through the years I’ve picked up some weeding vinyl best practices, tips, and tricks. Today I want to share those with you to make the process simple, quick, and effective. Leave the frustration behind and let’s get weeding some vinyl!
Please note that this post contains affiliate links. This means at no extra cost to you I earn a small commission if something is purchased through my link. Thanks!

Definition of Weeding
First let’s talk a little bit about what weeding vinyl actually means. In the creation process, weeding comes after your cutting machine cuts your design. Let me break it down for ya… All that means is that you are removing all the vinyl off of the carrier sheet or backing that you don’t want attached onto your final project.
If you happen to be using the vinyl as a stencil, then you will want to weed out (or remove) everything from where you want the paint to go. Sometimes things weed perfectly and other times the project and vinyl ends up in a giant ball for the trash. I’ve experienced both and let’s just say the ball of trash option is SUPER FRUSTRATING! Utilize these weeding vinyl tips below to prevent that frustration and even reduce vinyl waste.

Tips to Weed Vinyl Like a Pro
Quality Vinyl Weeding Tools
I have used so many different types of tools to weed vinyl with. Everything from no tools (just my hands) to seam rippers, and even the official Cricut and official Silhouette tool kit. My absolute favorite vinyl weeding tools that I have ever used though came in this kit pictured below from Expressions Vinyl. Included in the kit is not only an amazing weeder (the super sharp pick like tool) but also a mini exacto knife, a scraper to help you get air bubbles out when applying the vinyl, a measuring tape, and a pair of pointy tweezers that work wonderfully for weeding and removing tiny vinyl pieces.
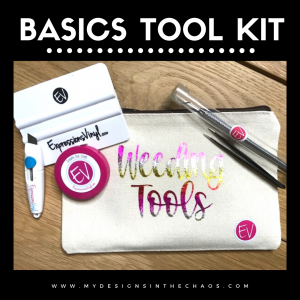
The handy dandy pouch to store them in also comes with it. Bonus!! That’s awesome because I am forever loosing my weeding tools (and the pouch hides them so my kids don’t walk off with one either… lol) I decided my pouch needed some decoration too (of course) so I used some deco foil with easy weed adhesive and added my name on one side and the words weeding tools on the other. (you can find that font here)
Watch me apply the deco-foil to the weeding tool bag live in this video:
Lighting
The lines that our machines cut in the vinyl can be very hard to see which can make weeding really hard. They can be even more tricky to see depending on the type of vinyl you are using. (cut lines on vinyl like glitter, holographic, and opal can really blend in) Lighting when weeding makes a HUGE difference.
In my craft room I have a ring light because not only does it help when weeding but I also love it for the live videos I create. You might not need something as heavy duty as the ring light but these otter desk lamps are also amazing. Another great option is a simple head lamp. You probably won’t win any fashion awards with this one but it’s hands free, cheap, and gives tons of light which makes the process of weeding your vinyl about a million times easier.

And yes I am in the car with my head light because sometime weeding your project just can’t wait. LOL!
Another great option for lighting is to light the vinyl up from the underside while you pull away the extra pieces. Light pads are the perfect thing to use for this. This is the light pad I use. Place the design on top of the light pad and the cut lines will become much more visible and it will be much easier to weed away the excess.
A Spot for Scraps
When you are weeding out your design you will end up with tons of tiny (and not so tiny) pieces of vinyl scraps. You can toss these to the side to clean up later (or in my case be found around the house in random spots later) or you can gather them up as you go. I’m going to recommend the latter. Gathering them as you go is so much easier and you will thank yourself for it. There are a couple ways you can gather your vinyl as you weed.
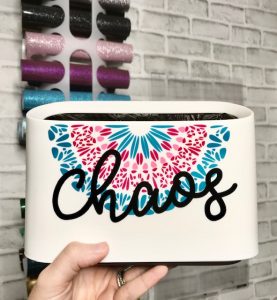
I have this little trash can on my desk that I can toss my extras in. It’s convenient and cute which is a win/win. I couldn’t resist adding this adorable free mandala design to really make it my own.
That trash can works great most of the time but sometimes you need something for the super tiny pieces. That’s when I like to use this ‘weeding ring‘. No that isn’t it’s official name but that is what I like to call it. Really it’s a nail polish bottle holder but we can keep that little secret between us. Your weeding tool fits nicely inside to scrape off the vinyl as you go and TONS of weeded pieces fit. When it is full, empty it out and start over. Another option is just an old empty tissue box, an old plastic wipes container, or even just a piece of scotch tape. Anything to collect and consolidate the weeded pieces of vinyl.

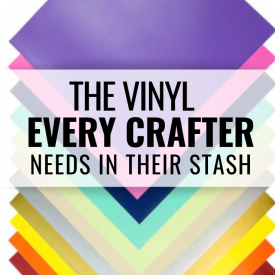
Quality Vinyl
Now, believe it or not the vinyl itself makes a HUGE difference in how easy it is to work with. When I was first starting out I didn’t realize this and would sometimes feel so defeated when a project wasn’t working and weeding the way it was supposed to. I then discovered that all vinyl is not created equal. My go to spot for all my vinyl now is Expressions Vinyl. Their vinyl weeds like butter when cut on the right setting and their transfer tape is super easy to work with.
They have a great box that is perfect for someone who is just starting or wants to spread their wings a little and try out some different types. It can be super overwhelming to try and pick out your first bundle…. go with this basics box and you won’t be disappointed. Not quite sure what the difference is between the types of vinyl? (HTV, adhesive, stencil, etc.) Head over to this post where we give you the 411 (not sure I’m cool enough to use that term but we are going with it) on all things vinyl.

Can you tell how in love with the colors in the basics box I am?! I think my face says it all!
Weeding Box
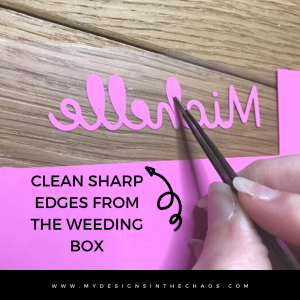
The next tip I have for you is to add a weeding box around your design. Basically what that means is put a rectangle around the outside edge of the design you are going to cut. There are a couple reasons why this is a good idea. First off it helps because it gives you a straight edge and a clean cut to save the rest of the vinyl sheet for another project. You can even add multiple boxes in the design itself to help weed smaller sections at a time. This makes a larger project much easier to weed.
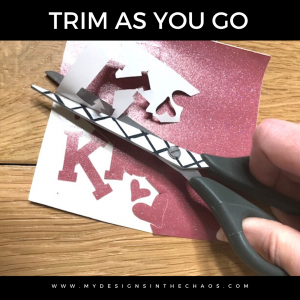
Trim the Vinyl
Another thing I love to do as I am weeding vinyl (especially on adhesive vinyl projects) is to trim the excess as I go. Sometimes with adhesive vinyl, if you are weeding a large project it is super easy to accidentally get it stuck to the non-weeded part. Remember how I talked earlier about some projects ending in a giant heap of vinyl…. yup this is typically how that happens for me. So to solve that if I trim as I weed (also weeding boxes above really help too) then it eliminates the stickage (yup just made that word up) factor.
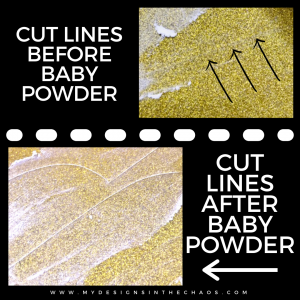
Baby Powder
Now, this tip might sound a little strange but I promise it really does work. If you are working with glitter heat transfer vinyl, the cut lines are SUPER hard to see. That makes weeding tricky and hard but here is a little trick… sprinkle a small amount of baby powder on the back of the design. (you can also use chalk) Gently rub your finger over the powder to spread in on the back of the vinyl. What happens is the powder or chalk will settle in the creases of your cut lines. Now viola… you to see the areas that need to be weeded and the spots to avoid. It really speeds up the process and with good light like we mentioned above it is amazing the difference it makes.
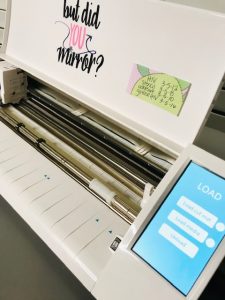
Notes on machine
This tip for weeding really comes before the actual weeding process itself. If your machine cuts the vinyl properly, most of the time (unless like we talked about above you got some wonky vinyl) the vinyl will weed like a champ. In order to ensure that you are cutting on the proper setting, tape a note card to the outside of your cutting machine and write down which settings work (for you and your machine) for each medium that you cut.
Even though there are specific settings on your machine for specific materials, as I learned my machine better, I learned which settings she liked for which material and it didn’t always line up exactly with the suggested ones. Writing them down on a note card on my machine (or even applying it in adhesive vinyl to the top) saved me time (and frustration) in the future when working and switching between a variety of materials and projects. When you have the perfect cut, your vinyl weeding part of the craft process becomes so much easier.
Warm up the HTV
Now this tip sounds a little bit counter intuitive. Get the heat transfer vinyl warm before I weed? HUH? Yup, you heard me right! If you warm up the heat transfer vinyl it become much more pliable… notice how I said warm and NOT hot! You don’t want it to be able to adhere to anything yet. Just get it to the point of being flexible instead of brittle. Weeding something bendy like butter instead of something that feels like plastic is so much easier. I like to gently place it on my heat press as it is warming up for my project.
Working through the tips above you should be weeding vinyl like a pro in no time. Do you have a tried and true tip for easily weeding vinyl that you would love to share? Feel free to comment below and join in on the discussion of tips and tricks…. because remember… crafty friends don’t let other crafty friends suffer through frustration when weeding vinyl.
Don’t forget to pin this post for reference later and see you next time! ‘Til then happy crafting, cutting, and chaos!

Looking for some fun freebies to practice your new vinyl weeding tips with? Check out some of these popular free SVG file posts:
11 Comments
Leave a Comment

Learn to develop, and grow your crafting skills!
My mission is to develop, encourage, and grow your crafting skills, and confidence through freebies, tutorials, our club, and our signature course.

Behind the Chaos...
My name is Michelle and I am the creative director behind the chaos. I'm so are glad you are here and hope you find inspiration and confidence to create something beautiful out of the chaos in your craft room and in life.
free ebook!
Bring your creativity to life quickly and easily.
This guidebook will give you a detailed look into the creative crafting cycle called the Craft Maker Process.

[…] weed but the end result is totally worth it. Check out our favorite weeding tips over here on this post. You can also always print this design or try out sublimation too! Either of those would […]
[…] This first one does double duty. It could be either a softball or a baseball depending on the vinyl color that you use. If you are looking for more baseball/softball files we have a tons here and here. And while these grunge designs look great once they are done… they can sometimes be a pain to weed. Check out all of our favorite weeding tips here. […]
This was so helpful thanks
Thank you sooooo much for all these tips! That baby powder tip is a game changer for me!$
You’re very welcome!
Hi,
I always have trouble with the Cricut brand Premium Matte Vinyl, no matter how much pressure I use. I even changed my blade on my Explorer 2 and the cut still did not go through. I love the color of the vinyl and I keep trying to see if it will work, evening cutting it twice only to see that the lines were off on the second cut and I screamed so loud when I had to waste it. Any ideas?
Definitely test cut. If it’s not cutting through, I’d move the pressure up. You can ask about this specific vinyl over in our group. I’m sure somebody has found the perfect setting for that.
Thanks! the baby powder is a gret idea.
Right!? Game changer
Wow! Such great tips!
Thanks! Hope they help!