Heat Transfer Vinyl – Easy Valentine’s Day Shirt
share on social:
One of my favorite items to work with is heat transfer vinyl. Today we made the cutest Valentine’s Day Shirt live over on our Facebook page and I wanted to make sure and share the directions here with y’all as well.

Making The Shirt Live:
Supplies
Heat Transfer Vinyl (select whichever colors you want your design to be)
SVG file (this is the Valentine’s day design we used on the shirt)
Heat Press (Iron or Cricut Easy Press will also work)
Cutting Machine (Silhouette or Cricut)
Step One
The first thing you will want to do is open up your file and cut out each section on the color that you want. Make sure to mirror your image when cutting. If you don’t, when it is applied to the shirt it will be backwards.
My favorite cut settings on my Silhouette for heat transfer vinyl are 3, 5, 8 but every machine is different. (Glitter heat transfer vinyl I like to use 3, 5, 10) Utilize the test cut feature to assure a good cut before ruining an entire piece of vinyl.
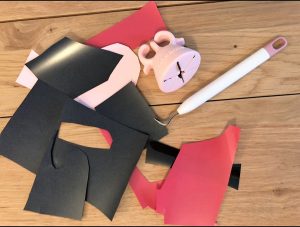
I like to use ALL my scraps (which is why all my pieces look so oddly shaped).

Step Two
The next thing you will need to do, once your design is cut, is weed the vinyl. This just means you will peel up all the vinyl that you don’t want stuck to your shirt. (check out the video above to see exactly what I mean)
Step Three
Once each of your pieces is weeded, it is now time to press. I like to stick my entire design on there first to determine how I want to lay it out. Don’t press it yet though or you will have a HUGE mess on your hands. Once it is layered and aligned on the design, peel everything up except the very bottom layer. Leave the bottom layer exactly where it was to begin with. This gives you a starting point for pressing.
Then press that layer for about 3-5 sec at 315 with your teflon sheet between the design and the heat press. (I have mine attached to my press with magnets) Just enough for the vinyl to get hot but not for the full amount of time and then peel up the carrier sheet. Now add on the next layer and repeat until all the pieces of your design are pressed. Once everything is attached give it one good 15 sec press. (don’t forget your teflon sheet)


It really is that simple to use heat transfer vinyl…. Cut, Weed, Press. Check out all our SVG files here and make sure to pin this post for future reference!


Happy Crafting!!
4 Comments
Leave a Comment

Learn to develop, and grow your crafting skills!
My mission is to develop, encourage, and grow your crafting skills, and confidence through freebies, tutorials, our club, and our signature course.

Behind the Chaos...
My name is Michelle and I am the creative director behind the chaos. I'm so are glad you are here and hope you find inspiration and confidence to create something beautiful out of the chaos in your craft room and in life.
free ebook!
Bring your creativity to life quickly and easily.
This guidebook will give you a detailed look into the creative crafting cycle called the Craft Maker Process.


[…] Sometimes waiting isn’t always the best thing to do. Sweating gets results. This play on words is a fun and simple design that would look awesome all in one color or in more of an ombre effect as pictured. If you are wanting to make a shirt with heat transfer but aren’t quite sure of the steps check out this step by step tutorial here. […]
[…] This first file is perfect for any mom. You would use heat transfer vinyl and apply the design on a shirt. It would be a super quick and easy shirt creation process. It could be worn around town for errands, to trick-or-treat, or throughout the entire season really. Check out exactly how to apply heat transfer to a shirt here. […]
Looking at those gorgeous valentines SVG print shirts.would love to download them please and thank you!
Thanks so much! These designs are inside of our membership Club Chaos. Feel free to learn more here:
https://my-designs-in-the-chaos.mykajabi.com/join-club-chaos