Free Birthday SVG and a sweet candy bouquet
share on social:
Everyone loves candy, and this week in Make It Monday with Michelle, we’re creating a birthday candy bouquet for all the candy lovers in your life — we even have a free birthday SVG file you can use.
There are tons of ways to add your own personal touches to this project. We used plain cardstock, but you could use patterned cardstock, and add bows, ribbon, or any kind of small decorations. Get your creative juices flowing!

Scroll to the bottom of the post to grab your free Happy Birthday to you SVG file.

Watch the live video to how to create a birthday candy bouquet step by step:
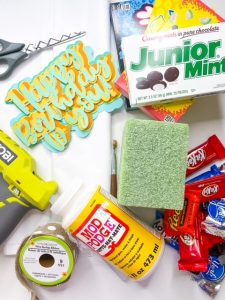
Supplies we’ll use for our birthday candy bouquet:
- Free Birthday SVG
- Several sheets of cardstock in coordinating colors
- Skewers (like the kind you can find at the grocery store)
- Foam used for flower arranging
- Hot glue gun and glue
- Mod podge
- Paint brush
- Individually packaged candies of various kinds, like the fun size bars in a bag of assorted candy
- Movie theater size boxes of candy
- Optional: wrapping paper and tissue paper, bows, other adornments
Step 1
Cut and weed out the Happy Birthday design — you can download the free birthday svg file linked at the end of the blog. Use whatever color cardstock you like, mix and match coordinating colors, and use some patterned cardstock if you want. This is a chance to personalize the birthday candy bouquet for your special someone. You’ll want to use cardstock that has color or the pattern on both sides though. And the free birthday svg has all the letters connected in each layer, which will make it easier to mod podge them together.
Pro tip: When cutting cardstock, slow down the cutting, and make sure to use a sticky mat, or it won’t cut as smoothly and your edges might get frayed.
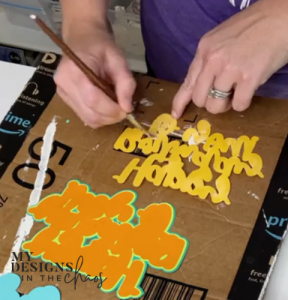
Step 2
You’ll have two of the largest layer — put one of them to the side, because we’ll need one later to secure the skewers. Using a paint brush, mod podge your layers together, and don’t forget the dots for your “i” and exclamation point!
I like to use mod podge for this part because it helps create a sturdier topper for our project and helps flatten any areas that maybe didn’t cut so smoothly. And the mod podge dries clear. The layers can get a little heavy, so just be careful when you pick them up to put them into place.
Finish with a final layer of mod podge on top, just to seal everything, make it a little sturdier, and to make it a bit shinier.
Step 3
Once the layers are all together (except the one extra back piece), set them aside to dry while we work on the rest of our candy bouquet. Place your boxes around the foam block so you can see which ones fit best on which sides. Your foam square should fit in the middle with enough room on the sides to place the other boxes. Using a hot glue gun, glue the foam to the candy box. Use another box for one of the sides, again using the glue gun to attach the box to the foam center. Remember to hold it for a few seconds to let it set before moving on to the next side. And also remember to face the pretty side of the candy boxes out.
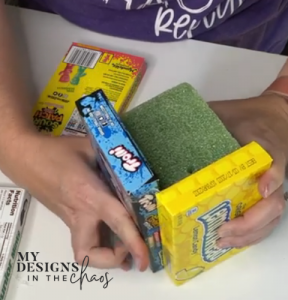
Once all the boxes are attached, you can absolutely leave it as is. The candy boxes make a pretty decoration all by themselves. You could also cover it with decorative cardstock, personal messages, wrapping paper, or attach bows or other adornments — it’s totally up to you!
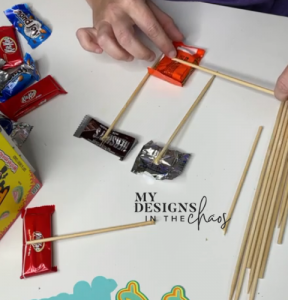
Step 4
Next we’ll glue the smaller candy bars or other wrapped candy to the skewers. You’ll want the skewers to be different lengths, like flowers would be in a bouquet. Just put a little dab of hot glue on the candy wrapper, attach the skewer and hold it for a few seconds to let it set. And make sure you’re gluing the candies right side up and with the wrapper fold on the skewer side. We just want our best side facing out. You could also decorate your skewers by adding little bows.
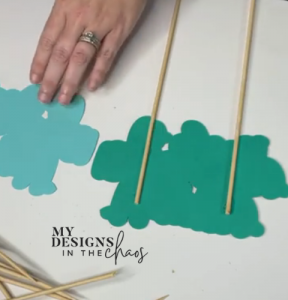
Step 5
Now let’s put the back on our bouquet topper. Use hot glue and glue a skewer onto each side of the back of the layered piece. Then attach it to the layer we set aside, so that the top of your skewers are between the two. Now you have a cute birthday sign to add to your bouquet; place it pretty far down into the foam block. Next, just add in the candy skewers all around. Just trim off some more of the skewers if you need to make some of them a little shorter.
Step 7
It’s time for a few finishing touches. Wrap your candy bouquet with a cute piece of ribbon and make a small bow. Use the glue gun to attache the ribbon to the candy box side, and to attach the bow to the ribbon. You can use tissue paper (or tulle, or ribbon) to fill in and cover the bottom. Just place in sheets from the back, gently pushing them through the skewers until it looks good to you. Or, you could just fill the bottom with small wrapped candies, like butterscotches and mints, smarties, gold foil chocolate coins, or whatever your birthday person loves best.

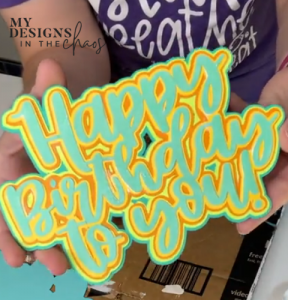
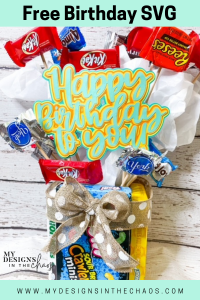
Finished Project
In just seven easy steps, we transformed a bunch of candy, skewers, and a foam block into an adorable candy bouquet, with our free birthday svg bouquet topper to make it really pop. The only thing left to do now is keep yourself from digging in before you have the chance to give your gift!
Join the list to learn more about the perks of being a Club Chaos member!
Additional Ideas:
This free birthday svg is super versatile! Here are a few ideas of additional ways you can utilize the file:
- Cake topper
- Cupcake stand decoration
- Attach it to the front of a blank card
The candy bouquet doesn’t have to be limited to birthdays either. It would be great in all these ideas as well:
- Graduation present
- Thank you gift
- End-of-year teacher gift
- Movie Night with popcorn and snacks
- Gift card tree
Download Your Free SVG HERE:
Happy Birthday To You Free SVG File
Make sure to let us know how you plan to use your candy bouquet – we’d love to hear from you!
Pin This Image For Later:

Make It With Michelle Mondays
Remember, every Monday we’ll do a project — we want to develop, encourage and grow your crafting skills and confidence. On Sundays, we’ll post a preview of two designs on Instagram, and you get to vote for which one we’ll create with on Mondays in a Facebook Live video. It’s a really fun way to learn and to be part of the process.
As a reminder, Club Chaos members will get both designs we previewed, so make sure to join the list and learn more. And if you didn’t get to vote this week, be on the lookout next Sunday!
Don’t forget… I want to see what YOU are creating. I can’t wait to see how you decorate your birthday candy bouquet! Show it off in our Facebook group and on Instagram. Help us spread the love about Make it Monday with Michelle, and don’t forget to vote next Sunday for your choice for the project of the week!
8 Comments
Leave a Comment

Learn to develop, and grow your crafting skills!
My mission is to develop, encourage, and grow your crafting skills, and confidence through freebies, tutorials, our club, and our signature course.

Behind the Chaos...
My name is Michelle and I am the creative director behind the chaos. I'm so are glad you are here and hope you find inspiration and confidence to create something beautiful out of the chaos in your craft room and in life.
free ebook!
Bring your creativity to life quickly and easily.
This guidebook will give you a detailed look into the creative crafting cycle called the Craft Maker Process.


Michelle I can seem to download this svg? It keeps asking me to sign in and I am logged in where it says members but nothing…and for whatever reason it will not let me and I do not remember my login info or my password and not sure where to go and find it either
Should be up and working now for you.
Hi, I still cannot download the svg for the Birthday Candy Bouquet. Any hints on why? Also when I login as a member I don’t see the BLOG option any more.
Should be up and working now.
Thank you for fixing this on the blog now how do i get the other one? I am a member I think of all the other sites but I have no clue how to get the other one for members? thank you again
Hi Billie! There’s a section called Make it With Michelle in the HUB. If you post over in the Club FB group I can give you the direct link to it, but you should see it. May be on page 2.
Thank you so much for all your help
You’re welcome!