Heat Transfer Vinyl On Wood
share on social:
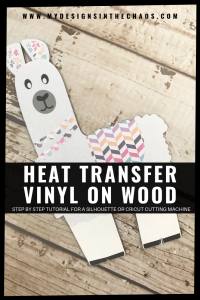
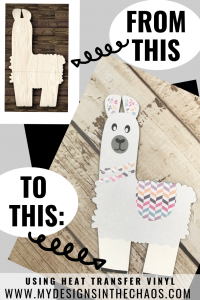
Llamas are all the rage right now. They are cute, trendy, and go with anything. In this tutorial I placed heat transfer vinyl on wood that was cut out in the shape of a llama and I can’t wait to show you the finished product.
*this post contains affiliate links which means that I earn a small commission when you shop through my link*
Even though I demonstrate this process with the llama, it should work with other wood products as well. It’s a nice alternative to painting or working with adhesive vinyl.
SUPPLIES:
Cutting Machine
Heat Press, Iron, or Easy Press
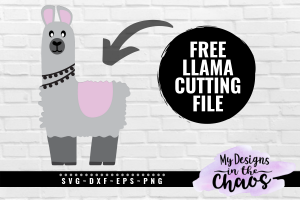
Llama SVG file (scroll down to the bottom of the post for the free file)
Paint (optional)
Step One
The first thing I like to do is to paint the background of my wood. I do this in case there are any spots that don’t line up 100% (and there will be spots like that and it’s ok). If the background is painted a similar color as the main vinyl piece you use it will blend in and not even be noticeable. The other thing you should do in step one is test cuts of your design.
In order to make sure your vinyl is the proper size I’m going to suggest that you do a test cut on paper first. This way you can test the size of your pieces, make sure everything is lined up the way you want it and you don’t have to waste any vinyl at all. Check out more of our favorite tips to reduce vinyl waste here.
Step Two
Now that you know all your pieces fit properly it is time to cut out the actual heat transfer vinyl. When using heat transfer vinyl on wood (HTV) make sure that the design is mirrored. When using patterned HTV from CSDS vinyl DO NOT MIRROR. You’ll see what I mean in the video below but basically, you have to transfer the vinyl to the carrier sheet and if you mirror it the design will be backwards.
Step Three
Now that everything is cut out it is time to apply! I used a heat press but you can use an iron or an easy press too. Place the base layer on first. In this project I was a rebel and did layer over glitter, but because it won’t be going in the wash or getting wear and tear I decided to risk it. Typically when making shirts and items with lots of use, you don’t want to layer on top of the glitter HTV. It doesn’t last as long due to the vinyl not being able to adhere to the shirt fibers.
After you apply the base layer you just go through and apply each layer after that one at a time. You can put more than one piece on at a time as long as the carrier sheets don’t overlap.
My heat press was at 315 and I pressed for 15 seconds each.
Interested in all our favorite crafting supplies including the heat press we use? Check out our Amazon shop here.
If you are more of a visual person and want to watch us piece it together live check out the video here:
DOWNLOAD YOUR FREE LLAMA FILE HERE:
Please note if you are on a phone you will need to download an app to unzip the file and access the SVG.
Thanks so much for stopping by and I can’t wait to see what you create with this free llama design and heat transfer vinyl! Putting the heat transfer vinyl on wood is a great project and the finished product is adorable!
Also on a side note… if you are nervous I want to encourage you to jump in and try anyway. The only way we learn is by doing and I can promise you one thing… you will mess up at some point. We all do! But that is totally OK! We all mess up, learn, and continue to grow.
Also make sure to show those vinyl on wood projects off on IG or FB and don’t forget to give us a tag so we can make sure and feature your project.
Interested in more freebies? Check out some of our popular posts:
‘Til next time, happy crafting, cutting, and chaos.
2 Comments
Leave a Comment

Learn to develop, and grow your crafting skills!
My mission is to develop, encourage, and grow your crafting skills, and confidence through freebies, tutorials, our club, and our signature course.
Behind the Chaos...
My name is Michelle and I am the creative director behind the chaos. I'm so are glad you are here and hope you find inspiration and confidence to create something beautiful out of the chaos in your craft room and in life.
free ebook!
Bring your creativity to life quickly and easily.
This guidebook will give you a detailed look into the creative crafting cycle called the Craft Maker Process.






Can you apply a coat of polyurethane to preserve and seal?
Yes but be careful because sometimes when applying something on top of HTV or Adhesive Vinyl it can actually over time reduce the tackiness of the material. I would hate for it to seep in and make it peel.