How to Open an SVG File
share on social:
How to Open an SVG File
When you first get a cutting machine, it is easy to fall down the rabbit hole of screenshotting the millions of things you want to make. The reality is though, the very first thing you need to learn how to do is how to open an SVG file inside the cutting machine software. All those beautiful projects that you want to create stem from this one skill. At first it can feel overwhelming but don’t worry… I’ve got ya! I’m going to walk you through step by step the entire process so that you can bring all those fun ideas to life!
What is an SVG File?
Before learning how to open an SVG in our programs, it’s helpful to understand what an SVG file is. To begin with, SVG’s stand for scalable vector graphics. This is basically just a fancy way of saying that you can make the design as big as you want (you can scale it) without it ever going blurry (or being pixelated). These types of files also have cut lines which is what our cutting machines read, to cut the vinyl or material that we are sending through the machine.
While our software can open other file format types, the best file version to use when cutting, is the SVG. You will also see PNG files included in most SVG file downloads but a word to the wise… those files don’t have cut lines on them. Learn more about the differences between the two file types here. Just remember that SVG’s are the best graphics file type to use if you want to cut vinyl for shirts, mugs, cups, etc.
Other Names for SVG Files
You will see SVG files called tons of different names. They are all referring to the same file type. Here are some examples of what people might refer to an SVG as:
- Cut Files
- Cutting Files
- SVG Designs
- Vector Graphics
- Scalable Vector Graphic
These files are layered and you can use them in cutting software alongside a cutting machine to create all kinds of beautiful, fun projects. Now let’s dive into the details of how to actually open one inside of our software.

Cricut Design Space
Let’s start with Cricut Design Space. First you will want to download the offline version of Cricut Design Space. You can do that by clicking on the white download button here. I am on a Windows so my screenshot is for the Windows version but go ahead and walk through the prompts on your device. It will look like this:

Once you have the software downloaded go ahead and open Cricut Design Space. It will give you two options: either set up a new device or sign in. We are going to go ahead and just sign in but if you need to set up your machine make sure to click the other option and follow the prompts.
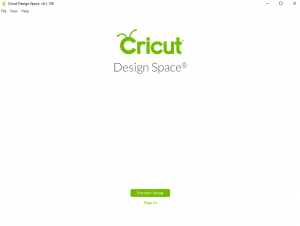
When signing in if you already have an account, then enter that information here on this screen. If not, go ahead and click create a Cricut ID. It is totally free to create an account and use the Design Space software.

The screen you will see once you have logged in (or created your account) will look like something similar to this. The top banner is frequently updated with current Cricut happenings so your preview image might look a little different and that’s ok. From this point there are several ways to open an SVG file. We can click on either location on the dashboard that says New Project. (the green button on the top right or the white square in the middle left of the screen)

After clicking on the new project button our blank canvas will open up. Now click on upload. It is on the left hand menu at the bottom.
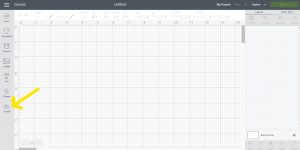
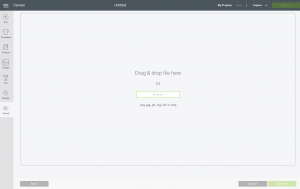
This will open up the upload image box. It will look like this:
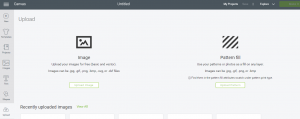
From here you have two options. Either, select browse or drag and drop. If you select browse this will open up a file folder on your computer. You can now locate the SVG file on your computer and then double click the SVG file that you would like to upload and cut. Or you can drag and drop the SVG into this screen and upload it from there.
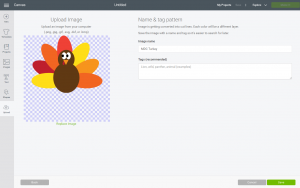
Name and tag the design (if you want to help keep them organized), then select the green save button save in the bottom right corner.
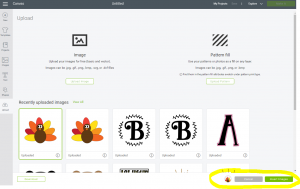
At this point you will see the design pop up at the bottom of the screen we were at earlier. You will see all your previous uploads here as well. Click one time on the newly uploaded design. (usually the one to the farthest left on your screen) It should show up in a bubble at the bottom of the screen. Then click insert images.
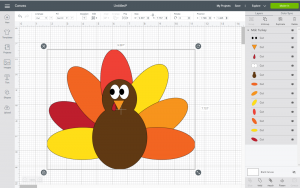
The SVG file will open onto your Design Space canvas for you to manipulate and create with.
Helpful Tips For Opening an SVG in Cricut Design Space
- Always open the SVG from inside the Design Space software. Do not just double click on the file.
- Make sure that the file folder where the SVG is located is unzipped first. Otherwise you will receive an error message that the design can not be opened.
- Confirm that you are in fact using the SVG file and not the PNG. Sometimes the SVG can show under the file type as HTML. That is the file that has the cut lines and the one you want to use.

Silhouette Studio
So now. let’s walk through exactly how to open an SVG in Silhouette Studio. To start with I want to note that SVG files can only be opened in the paid version of Silhouette Studio. It is a low cost one time fee that I feel is 100% worth it just for the ability to upload that file type (not to mention the other perks that come with it). If you are using the free version of Studio you will need to upload the DXF file. In that case I highly recommend doing a tiny offset (so small you can’t even tell the difference) and cut that instead. It will cut smoother and quicker than the DXF file. Learn more about how to do that here.
To begin with you will need to install the Silhouette Studio software onto your computer. Head over here, go to the current version row and click on the operating system link that matches the operating system that you have. On this screen you can also upgrade by clicking that blue button. Upgrade or not, you will still need to install the software. If you decide to upgrade you will input your code in your software to unlock the additional features.
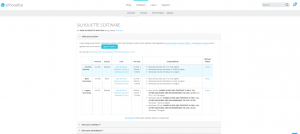
Once your software is installed open it up and you will come to the home canvas screen that looks like this.
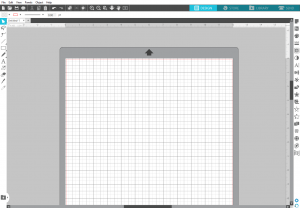
Locate the file folder at the top right hand side of the canvas and click on it. This will open up a file folder on your computer.
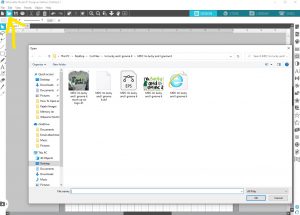
Navigate to the SVG file that you would like to open. Then click on that SVG file and select ok on the box.
Please note: The SVG file might read as HTML in the file type. It might also have an Internet Explorer thumbnail (like this example). That is the SVG file and the one you want to use if possible. Remember though if you have the basic version of Studio you will only be able to open the DXF file format. Be prepared for the DXF file to cut EXTREMEMLY SLOW and sound like lots of tapping as it is cutting!
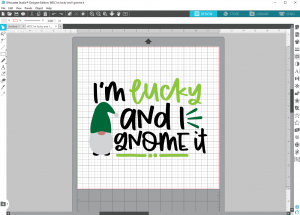
From here the SVG file will open onto your canvas. You can now manipulate it and send it to your machine to cut.
Helpful Tips For Opening an SVG in Silhouette Studio
- Always open the SVG from inside the software. Do not just double clicking on the file
- Make sure that the file folder the file is in is unzipped. If it is not the SVG file will not open.
- If you are using the free basic version of studio make sure to use the DXF file, do a small offset, and cut the offset instead.
Where Do I Create SVG Files?
Now that you know step by step how to open SVG’s you might be wondering what software do you use to create SVG files with? My favorite software to design in is Adobe Illustrator but I started designing in Inkscape. We actually have a full seven week course where we teach both of those software programs. It is called 123-SVG and walks you through step by step on how to design your own! We only offer it a few times a year. Join the waitlist for when we open the course experience again HERE.

There ya have it! The step by step of how to open an SVG file in both Cricut Design Space and Silhouette Studio. The cool thing now is your fun is just beginning. It’s time for you to bring all those project ideas to life with your cutting machine. To get you started we have tons of free SVG files here on our blog. Take a look around, download some, and then practice opening them inside your software. Don’t forget to unzip the files though! Without unzipping the download they are locked in their folder. (just right click and select extract all if you use Windows or on a Mac double click the file folder)
Just a reminder, if you found this post helpful we would love it if you would pin or even share it with a friend. Thanks!
Until next time, Happy Crafting, Cutting and Chaos!
2 Comments
Leave a Comment

Learn to develop, and grow your crafting skills!
My mission is to develop, encourage, and grow your crafting skills, and confidence through freebies, tutorials, our club, and our signature course.

Behind the Chaos...
My name is Michelle and I am the creative director behind the chaos. I'm so are glad you are here and hope you find inspiration and confidence to create something beautiful out of the chaos in your craft room and in life.
free ebook!
Bring your creativity to life quickly and easily.
This guidebook will give you a detailed look into the creative crafting cycle called the Craft Maker Process.



THANK YOU SO MUCH FOR PUTTING THIS OUT THERE!!! My wonderful hubby bought me the Cricut Explore Air 2 for Christmas as I have been making cards for years & cutting everything out by hand! I am technically challenged when it comes to using a computer & at age 61 it can be really intimidating. I have vision issues due to scarring on my cornea from shingles so the Cricut will be a life saver once I can learn to use it properly! I have spent the last 3 days searching for info and terminology & it has been frustrating as I realize how little I know! I have been crafting since I could hold a pair of scissors, so I realize the importance of prep work and figuring out which steps to do first. The hardest part is patience when I just want to jump in & get to the fun part of putting it all together! You have relieved alot of anxiety for me as I navigate through this new world & I feel like I now have enough confidence to bring my ideas to fruition. My family considers my cards a gift within a gift & I’m so excited to be able to create with a more polished look! THANK YOU THANK YOU THANK YOU!!!
This is awesome!