Dollar Tree Christmas Decor
share on social:
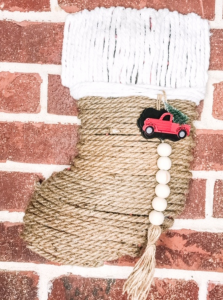
How to Make Dollar Tree Christmas Decor Stockings
This post contains affiliate links which means at no extra cost to you I earn a small commission when you shop through these links.
There is just something about a beautiful holiday mantle! But sometimes those mantles can come at a high ticket price. This Dollar Tree Christmas decor is one you are going to love. Get the high ticket look without the high ticket price tag. If you don’t mind a little bit of hot glue this project is going to be perfect for you. Let’s take a look at exactly what you need to make the cutest farmhouse stockings for easy Dollar Tree Christmas decor this season.

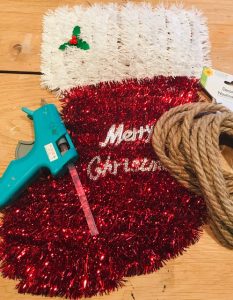
SUPPLIES:
Dollar Tree Stocking
Scissors
Hot Glue Gun
Twine
Mop Head
Items for beaded stocking charm:
Red Truck Ornament
Chalkboard Sign
Wooden Beads
Skinny Twine Rope
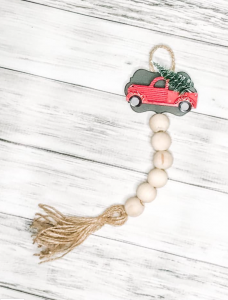
I got all my supplies for this project from Dollar Tree. The entire project cost less than $10 to make and I have extra supplies to be able to make another one which is a bonus. They really add that farmhouse touch to my holiday decor. I plan on using some small command strip hooks on the mantle to hang each of the stockings from. I will also probably add in some garland and greenery to put the finishes touches on this Dollar Tree Christmas decor.
Let’s Take It Apart:
Sounds a little weird at first but we are going to dismantle the Dollar Tree stocking. While it might be some people’s taste I am going for more of a rustic farmhouse look with my Christmas decor this year and the garland doesn’t really go. Take a pair of scissors and start cutting away the garland. Be careful here though because you don’t want to accidently trim the frame itself. That is what we will use to attach our twine pieces.
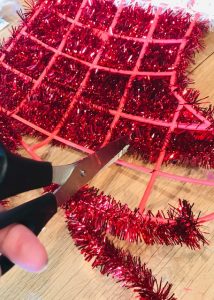
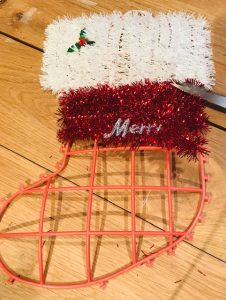
The garland on the stocking can be saved to add to another element in your holiday decor. Last week I put together these easy plastic hanger snowflakes and it might look great on those. Check out that DIY here.
Once you have all the garland off your frame will look a little something like this:
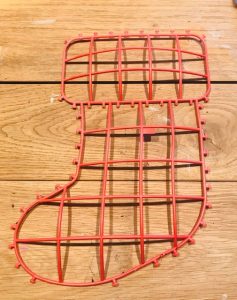
From there you will begin the layering of the jute/twine. The thicker the jute the less of it you will need.
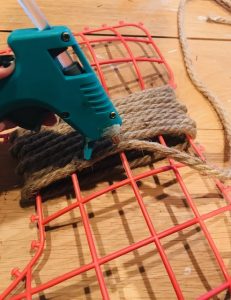
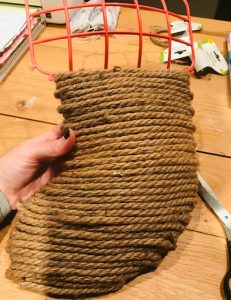
Now to start with I was wrapping the jute around the entire stocking frame. As you can imagine this was taking double the amount of supplies so for the bottom half of the stocking I trimmed the size I needed and hot glued the pieces to one another. I then used the hot glue to tuck the ends under to the back. You can see what I mean on the backside in this photo below.
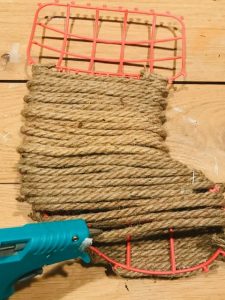
This is what the front of the stocking looks like at this point:
Let’s Make The Top
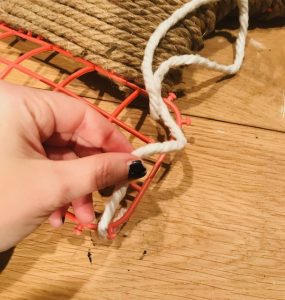
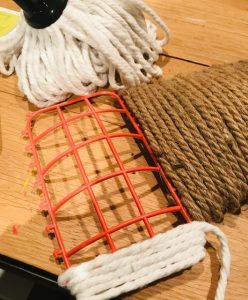
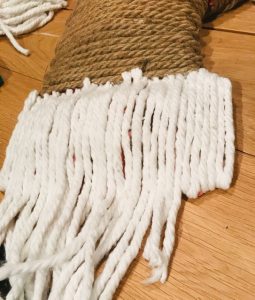
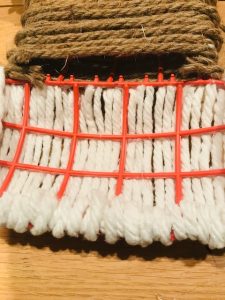
After the stocking part is fully covered it is time to move to to top fluffy white part of the stocking. What is Christmas decor without beautiful white stocking fur? Even though we won’t be using fur we will be able to recreate the same feel. To do this I used the head of a Dollar Tree mop. I pulled the individual mop pieces out and hot glued them to the frame and to each other. I did the same as what I did on the bottom half of the stocking and just cut the mop head fabric the length I needed and tucked in the extra piece with a little bit of hot glue.
Finish It Off
From here you will be able to see the spot where the two materials meet on the front. We want to make sure and cover that part up so take a few of the mop strings and wrap them the same direction as the twine. This will create a nice ‘frame’ around the top half of the stocking and it will cover up any loose ends.
Add A Personalized Touch
Now what is a stocking without a cute red truck or even a name? There are several different things you can do at this point to really personalize your Dollar Tree Christmas Decor so make sure to use your creative brain… but in the meantime: Here are a couple ideas that I came up with-
- Use some glitter spray to make it really shine
- Take some garland and add that around the middle section
- Hot Glue some poinsettias on the corner
- Wrap lights (battery operated like these or plug in outdoor lights would also work great) to help it glow in the evenings
- Hot glue sparkly snowflakes or flowers on the outside edges
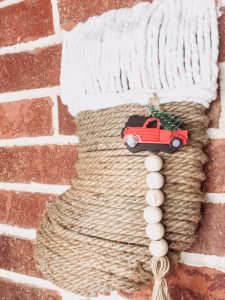
I ended up deciding to add a the charm I made during our Fun Five Challenge to the stocking. The charm has wooden beads, a cute little red truck and our family name and year on the back. It was the perfect addition to the farmhouse stocking.
Tips and Tricks:
Be very generous in applying the hot glue. The more you are able to connect each of the strings together the less you will be able to see the frame.
Use smaller twine to have the look make a larger impact. This will take much more twine though.
Snag some colored glitter spray (red, silver, gold, or green) to really help these stockings stand out in your home for the holidays.
Add some poinsettia flowers to the stocking to soften the feel and look of it.
Last Thoughts
I have also seen this same technique done with the bell frames and other shapes from the Dollar Tree to make some super cute Christmas decor.
If you end up giving one of these stockings a makeover I would love to see it! Feel free to show it off in our FB group here. It is always so fun seeing your touch on these types of projects. No two people do it the same way and it is so cool to see it come to life.
‘Til next time, happy crafting and chaos.
See you soon and please take a moment to pin this image before you leave! I appreciate it!
Check out some of our most popular posts here and don’t forget to pin the images for easy reference for later!
2 Comments
Leave a Comment

Learn to develop, and grow your crafting skills!
My mission is to develop, encourage, and grow your crafting skills, and confidence through freebies, tutorials, our club, and our signature course.

Behind the Chaos...
My name is Michelle and I am the creative director behind the chaos. I'm so are glad you are here and hope you find inspiration and confidence to create something beautiful out of the chaos in your craft room and in life.
free ebook!
Bring your creativity to life quickly and easily.
This guidebook will give you a detailed look into the creative crafting cycle called the Craft Maker Process.





enjoyed looking at your page. I will be back
Come back anytime! Let us know if you have any questions. 🙂 Team Chaos